In this Root Guide we will show you How to Root your LG G2 phone with very easy simple step, with screenshots to make it easy for you to keep up. NOTE: Rooting your device will void your warranty may brick your device so continue at your own risk.
STEP 1 – Download the LG USB Drivers From HERE and install them on your computer.

STEP 2 – Navigate to System Settings > General > About Phone > Software Information on the phone.

STEP 3 – Keep tapping Build Number until it tells you “You Are Now a Developer”.

STEP 4 – Enable USB Debugging under developer options. You can get to developer options under System Settings > General > Developer Options.

STEP 5 – Plug in the device via USB and let the drivers install.

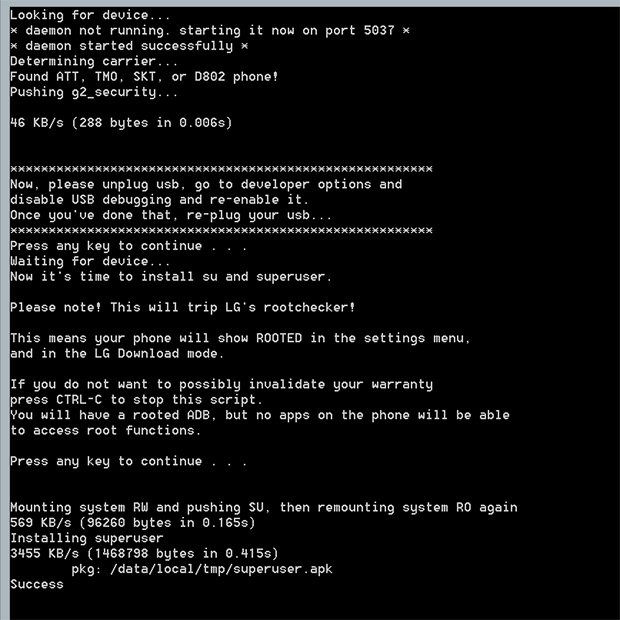
STEP 6 – Download the rooting tool from the developer’s page HERE in the first post. Then, Extract all files from the zip to a folder on your hard drive.

STEP 7 – Double click the root.bat file and follow the prompts in the program.

STEP 8 – Unplug the phone from the computer when prompted.

STEP 9 – Toggle USB Debugging off and on and then plug the device back in.

STEP 10 – Hit “Enter” on the computer and wait for the program to finish rooting the device.
You should now see Superuser in your app drawer if all went to plan. and you’re DONE!

Your G2 is Now Rooted!